Machine Learning on Windows 10 – Part 3: ML Environment
In the previous two posts we installed WSL 2 and then installed the latest version of Ubuntu and Windows Terminal.
In this post, we will review deploying a Machine Learning environment
Setting up an IDE\Code Editor
I have been using Visual Studio for many years and have watched it evolve nicely. The current version, as of this writing, is 2019. Unfortunately, it is very much tied to the Microsoft .Net Framework and Windows. More recently, Microsoft released a multi-platform version called Visual Studio Code. This is the IDE and Code editor that I will install and use. It works very well with WSL 2, Linux, Windows, and git. The latest version can be downloaded from https://code.visualstudio.com/.
Documentation is located online: https://code.visualstudio.com/docs/?dv=win
Once Visual Studio Code is installed, you will have to exit from any running command windows, Linux or Windows.
The first time you start Visual Studio Code you will see the following message:

Click on Install. This will allow you to edit files within the Linux file system.
To make working with Python and Jupyter notebooks easier, I installed the VS Code Python Extensions.
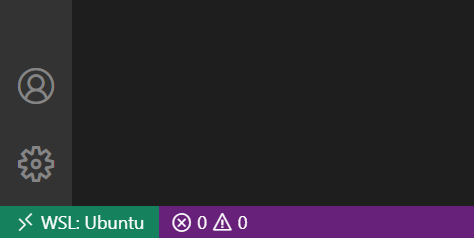
Open a Linux command line, either by clicking on the Ubuntu icon, typing wsl in a Windows Command Prompt or PowerShell, or running Windows Terminal. Once at the Linux command prompt, type in “code”. This will install the Windows Visual Studio Code server within Linux and then launch Visual Studio code IDE in Windows. When launched from the Linux command prompt, Visual Studio Code will be using the Linux file system. You should see the following indicator at the bottom right corner:
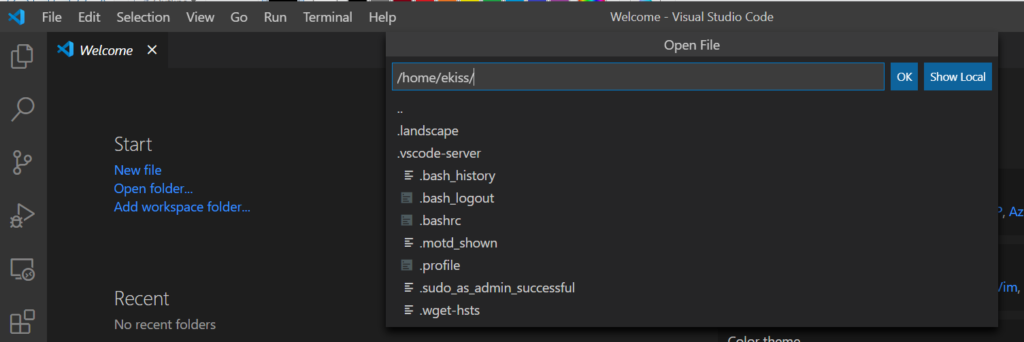
When selecting File->Open File … VS Code will use the Linux file system.
You can also start a Linux Terminal session from within VS Code. In addition, VS Code works really well with git.
In many cases, you will be able to do everything needed from within VS Code itself, and not have to use any other tool.
I am also using NotePad++. I have found this to be a really good text editor with many features and plugins. It is much more light-weight than VS Code. The two plugins that I tend to use the most are the Compare and XML Tools. There are both 32-bit and 664-bit versions. I use the 64-bit version.
Source Control and Code Repository
Over the last few years, git has become the de facto source control and online repository for most Open Source projects and packages.
Git has to be installed separately for Windows and each Linux distribution.
The Windows version of git can be downloaded and installed from the link below. I installed the 64-bit version.
https://git-scm.com/download/win
When installing, git lets you select some defaults:
- A default editor: I selected NotePad++.
- Set the Path Environment: I used the default -> Git from command line and 3rd party software
- HTTPS transport backend: Use the OpenSSL library
- Configuring the line ending conversions: Checkout Windows-style, commit Unix style line endings
- Configuring the terminal emulator to use with Git Bash: Use MinTTY
- Choose the default behavior of ‘git pull‘: Default (fast-forward or merge)
- Choose Credential Helper: Git Credential Manager
- Configuring extra options: Enable file system caching
- Configuring experimental options: Leave unchecked
Git has to be installed on Linux separately. Ubuntu comes preinstalled with git, however you can run the following command o install or update to latest version.
In order to get some packages, you will need a free github account.
Once the github account is setup, enter the following three commands in both the Ubuntu terminal and Windows git bash, replacing the Name and email.
git config --global user.name "Your Name"
git config --global user.email "your_email@domain.com"
git config --global credential.helper store
Conda
Conda is used to manage data science\machine learning libraries and packages. Miniconda installs just the minimum, while Anaconda manages many more packages.
For this post I will be installing Anaconda for Python 3 in Ubuntu.
wget https://repo.anaconda.com/archive/Anaconda3-2020.02-Linux-x86_64.sh
sh ./Anaconda3-2020.02-Linux-x86_64.sh
Close and re-open Ubuntu command line and type the following:
which python
which conda
You should see the paths to the anaconda binary folders
Update all the packages by entering the following
conda update --allConda allow you to maintain multiple environments. This helps maintain separate environments for different projects.
To create an environment called ‘pandasenv’ with the pandas package installed, type the following:
conda create --name pandasenv pandasTo activate this environment, use
conda activate pandasenvTo deactivate an active environment, use
conda deactivateJupyter Notebooks
Jupyter Notebooks is a tool that allows developers to share projects and collaborate. When working on ML algorithms, trial and error, plus collaboration is important. Jupyter supports running Python code inside the Conda environments, annotating code with markdown, displaying charts and other visuals.
Jupyter Notebooks comes pre-installed in the base Conda environment. However, if you are in a separate environment, such as the “pandasenv” we created above, you will have to install a new instance.
conda install jupyterTo verify that Jupyter is installed type the following:
which jupyterIf you are in eh base Conda environment you will see the following:
/home/{username}/anaconda3/bin/jupyter
If you are in a separate Conda environment,ch as the one we created above, Jupyter will be here:
/home/{username}/anaconda3/envs/pandasenv/bin/jupyter
To launch the Jupyter Notebook server enter the following:
jupyter notebookIf the setup was successful, you should something similar to the screen shot below. Copy one of the URLs from the command window and paste in a browser, You should see the Jupyter Notebook page appear, with a listing of the folder where you started the notebook.
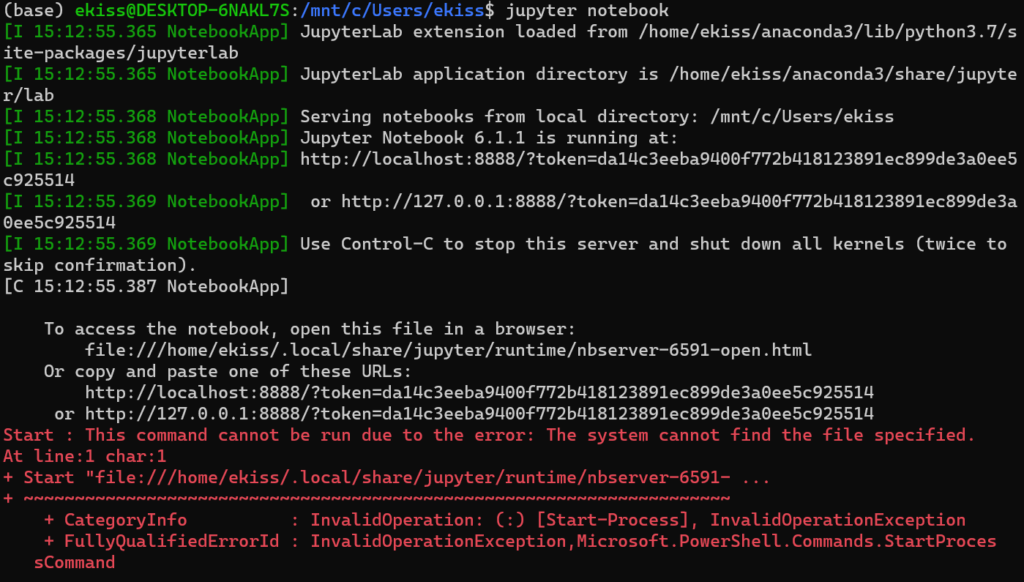
Notice that there were some errors. These errors occurred because Jupyter Notebooks tries to launch a browser instance but needs to know the path. This can be resolved by opening the /home/{username}/.profile file, I used VS Code, and adding the following to the end..
# Path to your browser executable
export BROWSER='/mnt/c/Program Files (x86)/Google/Chrome/Application/chrome.exe'
Next, you have to let Jupyterow
The default redirect file that Jupyter uses is not compatible with WSL 2. Create a Jupyter config file and set use redirect to false using the instructions below.
jupyter lab --generate-configThe command above woll create a config file for Jupyter with some default settings here: /home/{username}/.jupyter/jupyter_notebook_config.py
Open that file with VS Code and uncomment the use redirect line. Make sure that it is set to false like below:
c.NotebookApp.use_redirect_file = False
Next time Jupyter Npbooks is started, there should be no errors.
This completes setting up a Python Machine Learning development environment.
In the next post we will review using Jupyter Notebooks, Python, and some common sample projects.
Resources: